Add Row
Add Element
cropper
update
Cali Home Services
update
Add Element
  • Home
  • Categories
    • Smart Home Technology and Automation
    • Energy Efficiency
    • Home Restoration and Renovation
    • Eco-Friendly Cleaning and Maintenance
    • Virtual Interior Design and Home Staging
    • Home Health and Wellness Services
    • Outdoor Living and Landscaping
    • Legal and Consumer Protection
    • Real Estate Market Updates
    • Emergency Preparedness
    • Home Organizing and Decluttering
    • In-Home Health Services
    • Cleaning and Housekeeping
    • Home Maintenance and Repair
    • Home DIY
May 09.2025
4 Minutes Read

Choosing the Right Drywall Anchor: Essential Guide for California Homeowners

Various drywall anchors on corkboard - Choosing the Right Drywall Anchor.

The Essential Guide to Choosing Drywall Anchors: Safety and Performance

When it comes to home improvement projects ranging from hanging art to securing shelves, the type of drywall anchor you use can make all the difference. In California’s diverse urban and suburban settings, where home styles vary greatly, understanding the nuances of drywall anchors is essential for any homeowner or DIY enthusiast. Choosing the right drywall anchor ensures safety while preventing damage to your walls—a skill that every homeowner should master.

Understanding Different Types of Drywall Anchors

There are several types of drywall anchors available, each designed for specific weights and applications. This diversity can make the choice a bit overwhelming, but with the right knowledge, you can ensure that your projects not only look good but also stand the test of time.

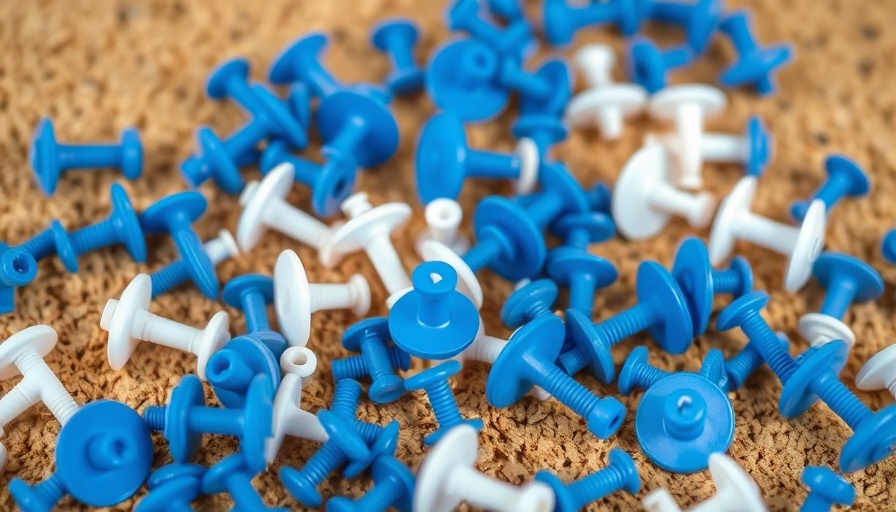
Plastic Expansion Anchors: Lightweight and Easy

Plastic expansion anchors are cylindrical with fluted ends and are perfect for light-duty tasks. They are typically rated to hold between 5 to 25 pounds depending on the size and type of drywall. When a screw is driven into a pre-drilled hole, these anchors expand to create a friction fit within the drywall.

While these anchors are inexpensive and easy to install, they do have their limitations. Over-tightening can crack them, reducing their holding power. Therefore, they should be used with care, primarily for less weighty items.

Molly Bolts: Versatile and Strong

Molly bolts are another step up, accommodating weights of 25 to 50 pounds. Their unique design includes a plastic or metal sleeve, which expands against the drywall's interior when tightened. This makes them suitable for medium-duty applications.

An excellent feature of molly bolts is that you can remove and replace the screw without losing the anchor itself, making them ideal for interchangeable pieces like picture frames and shelving units. However, installation too close to a stud can hinder their effectiveness, so be mindful during installation.

Threaded Drywall Anchors: The Self-Tapping Solution

For more demanding applications, threaded drywall anchors offer a robust solution, able to hold from 25 up to 75 pounds. Unlike others, these anchors screw directly into the drywall without needing a pre-drilled hole, thanks to their self-tapping design.

This ease of use and high capacity make threaded anchors incredibly popular. They provide a secure hold for heavier items like TVs—essential for homeowners looking to utilize their wall space effectively without compromising safety.

Evaluating Weight Requirements

When selecting a drywall anchor, it's crucial to consider the weight of the object you intend to hang. Experts recommend choosing an anchor rated for 25% to 50% more than the actual weight of the item. This precaution helps mitigate risks of failure.

For instance, if you're hanging a mirror weighing 10 pounds, opt for an anchor that can hold 12 to 15 pounds. This margin of safety proves invaluable in preventing mishaps—and protects your walls from unnecessary damage.

Common Misconceptions About Drywall Anchors

Many DIY enthusiasts believe that all drywall anchors are created equal. This misleading assumption can lead to inappropriate anchor usage, causing structural failures. It's essential to understand that each type has specific weight limits and ideal uses, which should be respected.

Additionally, some may think heavier-duty solutions are always necessary, leading to excessive drilling and wall damage. Instead, assess the weight and distribution of the item before deciding on the anchor type.

Practical Tips for Successful Installations

No homeowner wants to see their hard work come crashing down. Here are a few practical insights to keep in mind:

  • Always utilize a stud finder to locate studs when possible, as securely fastening into wood is generally the best choice.
  • Ensure the hole for the anchor is just right—not too big, and not too small to cause stress on the wall.
  • Before final installation, always perform a test to ensure the anchor can hold the intended weight, especially after minor adjustments or repairs.

Future Trends in Home Anchoring Solutions

As technology advances, the landscape of home improvement evolves too. Expect to see anchors that feature easy-install mechanisms and smart technology integration in the future. For instance, some manufacturers are developing anchors that can report weight limits or notify homeowners of stress failures—highlighting the growing relationship between home technology and practical renovations.

Conclusion: Make Informed Choices for Your Home

As a California homeowner or potential buyer, being knowledgeable about the appropriate drywall anchors can ensure not just the aesthetic appeal but also the safety of your living space. Whether you’re in an urban apartment or suburban house, making informed, careful choices will empower you to tackle various projects competently.

Don't let drywall confusion compromise your home improvement efforts. Take the time to explore and understand your options, ensuring every piece you hang is not only beautiful but secure.

Home DIY

Write A Comment

*
*
Related Posts All Posts
08.04.2025

Experience Comfort and Style with Emily Henderson's Room Service Collection

Update Introducing Room Service: A Homeowner's Dream California homeowners, get ready to elevate your living spaces with the launch of Room Service by Emily Henderson. Designed with both comfort and aesthetics in mind, this furniture collection promises to cater to diverse tastes while being practical for everyday living. With 5 sofas and 2 chairs, all ready-made in America, the collection combines style with functionality. Thoughtful Design for Real Life Emily Henderson's passion for thoughtful design shines through each piece in this collection, developed over a year-long process that focused on comfort and family-friendliness. Not only does this collection feature visually appealing elements such as mid to dark fabric tones, perfect for California's vibrant lifestyle, but it also ensures durability, making them forgiving to spills and wear. Collaboration at Its Finest The collaboration with Sean Lowe and his business partner Clay, both seasoned in the furniture manufacturing world, allowed Emily's vision to flourish. Their combined expertise in operations and logistics has paved the way for a seamless production process, ensuring that homeowners receive high-quality pieces that don’t break the bank. This partnership exemplifies how blending creativity and experience can produce outstanding results. Behind the Scenes: The Making of Room Service The catalog shoot that showcased the collection took place at stunning locations, including Emily's brother's river house and a traditional Portland home, both artfully styled with Wayfair products. The efforts to create a captivating visual narrative not only spotlight the furniture but also represent the spirit of California living—infusing personal touches and beautiful design that reflect the lifestyles of potential buyers. Meet the Collection: A Sofa for Everyone Among the standout pieces is the Barb Sofa, which features a rounded arm and distinctive decorative leg. Named after Emily’s beloved pig, this playful touch adds character to the piece, showing that design can be functional while also tech-ready for family-friendly living. The entire collection includes various options, ensuring there’s something for every homeowner's unique style. The Emotional Connection to Home Furniture is more than just décor; it represents comfort and safety, becoming a part of family memories. Emily’s dedication to this emotional aspect of home life infuses Room Service with warmth, making it relatable for families with kids and pets navigating life in California. Each piece has been crafted not only for aesthetic appeal but for creating an inviting atmosphere. What Sets Room Service Apart? This collection isn't just about the look; it's about the full experience. The forward-thinking design is partnered with practical considerations—think performance fabrics and versatile colors. Investing in furniture from this collection ensures that California homeowners can live their lives without worrying about its wear and tear. Your Turn to Celebrate Home Living Emily's enthusiasm for this new furniture line is contagious. As someone passionate about turning houses into homes, she invites fellow Californians to lean into this collection, making a statement in their own spaces. If comfort and style are what you seek, explore the possibilities of Room Service and experience the joy it can bring to your living environment. This isn’t just another furniture collection; it’s a heartfelt invitation to homeowners to embrace comfort and creativity. Each piece tells a story, inviting you to create your own home narrative that reflects your life and values. Choose Room Service and give your home the upgrade it deserves!

08.04.2025

Master the Art of Installing Floor Transition Strips in California

Update A Comprehensive Guide to Installing Floor Transition Strips for California Homes Transition strips are essential elements in flooring that many homeowners overlook. In California, where diverse flooring materials and styles are common, choosing and installing the right transition strip can make all the difference in achieving both aesthetic appeal and safety. This guide provides clear, actionable steps to ensure you create smooth transitions in your home. Understanding the Importance of Transition Strips A floor transition strip plays a crucial role in achieving a professional-looking flooring installation. It not only enhances the visual flow between different floor types but also minimizes tripping hazards, which is particularly important for families and seniors. For California homeowners, the right transition strip can seamlessly blend various materials such as tile, hardwood, and carpet, allowing for a harmonious living space. Choosing the Right Transition Strip for Your Needs Before diving into the installation process, discerning homeowners will want to understand the different types of transition strips available. They typically fall into three broad categories: Thresholds: Ideal for doorways between rooms with the same height flooring. T-Moldings: Best suited for connecting similar-height flooring materials that meet at an angle. Reducers: Necessary when transitioning from a higher to a lower flooring material, preventing tripping hazards. When selecting a strip, consider the material as well. Options range from wood, which offers warmth, to metal for modern aesthetics and durability. How to Measure and Cut Your Transition Strip To ensure a proper fit, accurately measure the dimensions of the area where the transition strip will be installed—whether it’s at a doorway or between rooms. Use painter's tape to denote the exact cut lines on your transition strip. A jigsaw or hand saw can then be employed to make precise cuts. This step is vital; an ill-fitting strip can disrupt the overall look and safety of the flooring. Installation: A Step-by-Step Approach Once you have your transition strip cut to the appropriate size, the installation process begins. You will need tools such as a drill, caulk gun, and measuring tape to properly secure the strip in place. Depending on the type of transition strip you selected, your installation method may vary. Self-adhesive strips are straightforward, while glue-down or nail-down options require more effort and precision. Common Mistakes and How to Avoid Them One common pitfall is not accounting for height variations between the floors. This oversight can lead to an uneven finish and potential safety hazards. Additionally, many homeowners neglect to clean the surface before applying adhesive, which can affect bond strength. Taking the time to prepare your workspace is critical to a successful installation. Final Touches and Maintenance Tips After installing the transition strip, it's beneficial to inspect your work regularly to ensure it maintains its appearance and structural integrity. Cleaning can be done easily with a damp cloth and appropriate floor cleaner. For wooden strips, periodic refinishing may be needed to maintain their luster. The Benefits of DIY Installation Many California homeowners might consider hiring a professional for flooring transitions, but DIY installations can significantly reduce costs while providing a sense of accomplishment. With the right tools and techniques, anyone can master the installation process. This self-sufficiency is particularly appealing in California's DIY homes, where individuals embrace home improvement as a means to create personalized spaces. In Closing: Take Charge of Your Home Improvement Your home is a reflection of your personal style, and mastering the installation of transition strips can truly elevate your space. By following this comprehensive guide, you can ensure that your flooring transitions are not only visually appealing but also safe and functional. Make your home a haven by investing a little time into its improvement—start planning your project today!

08.03.2025

Reimagining Small Spaces: 4 Stylish Bathroom Makeovers Under 100 Square Feet

Update Transforming Tiny Spaces: The Power of Smart Bathroom DesignIn the world of home renovation, the bathroom often receives the least attention, especially when space is at a premium. Yet, four stunning bathroom makeovers prove that thoughtful design can turn cramped, outdated spaces into stylish, functional retreats. These transformations, all under 100 square feet, showcase how designers and homeowners can solve big problems while adding personality and warmth to modest areas.1. The Cozy Lodge: A Rustic RetreatThe first project takes us to Coupeville, Washington, where a couple sought to invigorate their weekend getaway. With a design by Kristine Tyler from Treefrog Design, the 96-square-foot bathroom evolved from being a cramped, poorly designed area featuring an outdated corner tub to a chic, spacious oasis. The new design incorporates a two-person curbless shower and honed river rock tiles that embrace the home’s rustic charm, proving that functionality and style can coexist, even in small square footage.2. The Kids' Space: Function Meets FlexibilityAnother inspiring redesign emphasizes the importance of flexibility in a family bathroom. Utilizing smart storage solutions and multifunctional features like a double vanity, this space illustrates how careful planning allows a small area to support a growing family. By keeping everything organized and accessible, this redesign does more than enhance aesthetics; it creates an environment that's adaptable to the family's needs.3. Aging in Place: Designing for All Stages of LifeAs our needs change, so should our homes. One remodeling project takes aging in place into account, showcasing how to prepare a small bathroom for long-term accessibility. Features such as grab bars and curbless showers not only enhance safety but also add a touch of modern elegance, encouraging homeowners to think about future needs without sacrificing style.4. From Drab to Fab: Adding Personality to a Limited SpaceOne of the most remarkable transformations demonstrates how personalized design can inject life into an otherwise conventional bathroom. With colorful tiles, vintage fixtures, and strategic lighting, the newly-designed space invites warmth and creativity, reminding us that small bathrooms can be as unique and enjoyable as larger ones. It underscores the immense potential hiding within the square footage.Why Care About Small Bathroom Design?As cities grow and space becomes more expensive, the significance of efficient and appealing designs in tiny living quarters cannot be overstated. Reflecting on trends in California homes, where compact living is a norm, understanding how to make the most of lesser square footage can also increase property value. For homeowners in such areas, these design strategies not only cultivate a functional sanctuary but can also enhance the overall appeal when it comes time to sell. Creating Your Dream Bathroom: Practical TipsAs we analyze these transformations, consider these actionable insights for your own bathroom redesign project: Prioritize Functionality: Identify your needs first—whether that’s more storage, better flow, or added accessibility—before diving into aesthetics.Embrace Creativity: Don’t be afraid to select bold colors or interesting textures. These can make even the smallest of spaces pop.Plan for the Future: Consider how your lifestyle may change in years to come. Features supporting aging in place are becoming increasingly desirable.Engaging the Future of Bathroom DesignAs we reflect on these remarkable transformations, it becomes clear that making the most of small bathroom spaces not only improves daily living but also opens up avenues for innovative design. Whether you're planning a renovation to your California home or exploring creative DIY tasks, remember that you have the power to create spaces that inspire and function better.For those eager to dive into their own bathroom projects, don't wait! Start planning today to transform your space into a stylish and cozy retreat.

Terms of Service

Privacy Policy

Core Modal Title

Sorry, no results found

You Might Find These Articles Interesting

T
Please Check Your Email
We Will Be Following Up Shortly
*
*
*