Add Row
Add Element
cropper
update
Cali Home Services
update
Add Element
  • Home
  • Categories
    • Smart Home Technology and Automation
    • Energy Efficiency
    • Home Restoration and Renovation
    • Eco-Friendly Cleaning and Maintenance
    • Virtual Interior Design and Home Staging
    • Home Health and Wellness Services
    • Outdoor Living and Landscaping
    • Legal and Consumer Protection
    • Real Estate Market Updates
    • Emergency Preparedness
    • Home Organizing and Decluttering
    • In-Home Health Services
    • Cleaning and Housekeeping
    • Home Maintenance and Repair
    • Home DIY
Add Row
Add Element
May 06.2025
3 Minutes Read

Unlocking Creativity: How to Make Custom Brown Paint for Every Project

Mixing brown paint with a palette knife on a palette.

Crafting Your Own Perfect Brown: A Simple Guide

Imagine you're painting your living room a warm chocolate brown. You mix your colors, but wait—you're out of brown paint! Don't panic. You can easily create your own custom brown paint with just a few colors you likely already have in your collection. In this article, we'll not only show you how to mix brown paint but also provide valuable insights on enhancing your DIY home projects.

Understanding the Basics of Color Mixing

To successfully create brown paint, it's essential to understand the primary and secondary colors. The three primary colors—red, blue, and yellow—serve as the foundation for creating a variety of hues. By mixing two primary colors, you get secondary colors like orange, green, and violet. Combine varying amounts of these to produce shades of brown that suit your project. This basic knowledge can tremendously enhance your color mixing and can even inspire new palettes for interior design.

The Importance of Color Terminology

When mixing, knowing the terms can make your process smoother, especially if you're a beginner. A hue refers to the base color, while a tint is achieved by adding white, a tone is when gray is mixed in, and a shade is produced by incorporating black. Mastering these terms will provide you with a clearer palette for your creative projects.

What You'll Need for Mixing Brown Paint

Gathering your materials and tools is step one. For mixing custom brown paint, you'll need:

  • A mixing board or a clean flat surface
  • Primary color paints: red, yellow, blue
  • White and black paint for adjustments
  • A plastic spoon and a palette knife for easy mixing

Now, let’s jump into the painting process!

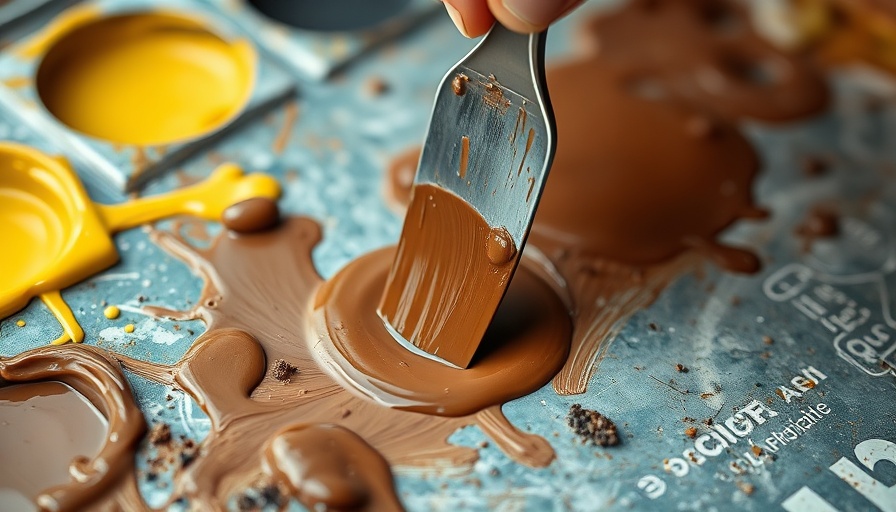
Step-by-Step: Mixing Brown Paint

Step 1: Mixing the Primary Colors

Start by pouring equal parts of red, yellow, and blue paint onto your mixing surface. For best results, be careful with the proportions because a small amount of one color can significantly alter the outcome.

Step 2: Adjusting for the Perfect Shade

After mixing your colors, you'll often find that you desire a different shade of brown. This is where incorporating black or white comes in. Adding black will deepen your color, while white will lighten it. Small adjustments can lead to your dream shade of brown.

Practical Tips for DIY Homeowners

When tackling home improvement tasks, always keep in mind these practical insights:

  1. Invest in a Color Wheel: This affordable tool can save time and enhance your color-mixing adventures by clearly showing complementary colors.
  2. Mix in Small Batches: Begin by mixing small quantities. Once you’ve found the right shade, recreate it in larger amounts.
  3. Practice Makes Perfect: Experiment with different combinations to discover new colors. The more you mix, the better you’ll understand how colors interact.

Enhancing the Value of Your DIY Projects

Mixing your own paint not only saves money but it also allows for unique customized colors that are perfect for your home’s aesthetic. Rather than relying on store-bought options, creating your own brown paint can help set the tone for a truly personalized living space.

Conclusion: Unlock Your DIY Potential

Mixing your own brown paint opens up a world of creative possibilities. With just a handful of primary colors, you can create shades that perfectly match your vision. So, gather your supplies, experiment with color, and transform your DIY projects today! Whether it’s a vibrant living room makeover or simple crafts, taking charge of your color choices fosters creativity and personal expression.

Explore your creativity through color mixing! Dive into your next DIY project and see the transformation that custom paint can bring to your home. You’ll be amazed at what you can accomplish!

Home DIY

Write A Comment

*
*
Related Posts All Posts
06.20.2025

Build a Stylish Kitchen Island with Seating: A DIY Guide for California Homes

Update Transform Your Kitchen Space: Building an Island with SeatingBuilding a kitchen island not only enhances the aesthetic appeal of your space but also serves as a functional hub for cooking, dining, and entertaining. With the use of IKEA components, this guide walks you through the steps to create a unique kitchen island with seating that perfectly fits your California home. Why Build a Kitchen Island? There’s a good reason kitchen islands are a staple in modern home design. They provide additional prep space, storage, and seating for casual dining or entertaining guests. Especially in urban areas where kitchens can be compact, an island helps maximize the layout without compromising form and function. Moreover, customizing an island to your specifications allows you to reflect your style and meet your needs. In California, where diverse culinary habits exist, an island can serve as a gathering point for family and friends. Essential Tools and Materials Required To embark on this DIY journey, gather the following tools that will aid in the construction process: Drill/driverJigsawFlush-trim router bitLevelRandom orbit sander Moreover, having the right materials is crucial. A standard list would include: Three IKEA Sektion base cabinetsHalf-inch and three-quarter-inch MDF panelsVarious screws and nailsBondo filler for a polished finish Step-by-Step Assembly Instructions Assemble the Cabinets First, construct the IKEA cabinets according to their manual, using wood glue and clamps. Good assembly ensures a stable foundation for your island. Remember that aesthetics matter, so the color-matched paint is essential to keep a cohesive look with your cabinetry. Pre-Painting the Panels Before you assemble the top of the island, pay attention to your MDF panels. Pre-paint these to save you from messy touch-ups later. A fresh coat before final assembly ensures that you won’t miss any spots once everything is in place. Creating the Countertop Your island's countertop can set the entire tone of your kitchen. Consider using white melamine for a sleek, modern look or opt for high-quality wood for warmth and richness. Finish off the edges with a router for a smooth finish. The Integration of Seating: A Practical and Stylish Choice Adding seating enhances livability within your kitchen. When designing your island, incorporate overhang on one side for bar stools. This extra step allows for informal meals or a space for guests to gather while you cook. It’s about creating a heart in your home where family and friends can connect. Finishing Touches: Paint and Details Once your assembly is complete, it’s time for the detail work. Use paint to touch up any areas that need it. Look into adding molding or trim to enhance the island's look—this brings a touch of craftsmanship to your project. Future Trends: Sustainability in Kitchen Design As California homeowners continue to prioritize eco-friendliness, consider your island’s impact on the environment. Utilize sustainable materials wherever possible, and think about how the island can support waste reduction — for instance, incorporating pull-out recycling bins. Whether you're planning your first build or enhancing your current kitchen space, customizing a kitchen island, especially one with seating, can significantly improve your kitchen experience. Don't let a crowded kitchen space or fixed layouts discourage you; with some effort and creativity, you can create a centerpiece that adds both function and flair. As you develop your project, remember: this is about more than just building; it’s about crafting a space that fosters togetherness and joy.

06.20.2025

Discover the Hidden Masters: Why the Gee's Bend Quiltmakers Deserve More Recognition

Update Unveiling the Hidden Masters: The Gee's Bend Quiltmakers In a world dominated by contemporary artists like Rothko and Warhol, an extraordinary collective has remained in the shadows, despite being heralded as the "most miraculous works of modern art America has produced." The Gee's Bend Quiltmakers, a community of African American artists from Alabama, have created breathtaking works that transcend traditional notions of art and craft. Their quilts, rich in history and symbolism, tell the stories of struggle, perseverance, and artistry, yet much of America remains unaware of their contributions. The Rich Tapestry of History The origin of the Gee's Bend Quiltmakers dates back to the early 19th century. This isolated community has crafted quilts using ingenious methods, adapting over generations to utilize available materials, often made from scraps of clothing and discarded textiles. Each quilt reflects not only individual creativity but the collective spirit of resilience of the Black community in Gee’s Bend, shaped by their unique sociopolitical landscape. Art as a Form of Resistance The quilts of Gee’s Bend are not merely functional; they serve as powerful statements of cultural identity and expression. Art critics have praised their work; the quilts have been described as vibrant, eye-popping masterpieces that challenge the norms of the art world. Using bold colors and dynamic patterns, the Quiltmakers have created visual narratives that resonate with personal and community histories. In their hands, textiles become a canvas for storytelling. Recognizing the Craft: A Call for Awareness Despite their acclaim, the artists of Gee's Bend have not yet achieved widespread recognition. This begs the question: Why aren’t their names as familiar as those of their contemporary counterparts? The phenomenon may be rooted in systemic inequalities that exist both in the art world and society at large. The unrecognized brilliance of these artists calls for a demand for greater awareness, an invitation to celebrate and uplift their contributions. Visual Storytelling in Quilts Each quilt by the Gee’s Bend artisans can be viewed as a page in a giant book that narrates their lives. The communal essence of quilt-making encourages collaboration and shared histories. By examining the patterns and colors, one can glean invaluable insights into the cultural significance and emotional weight behind these creations. For numerous collectors, including high-profile figures like Ray Eames and Jackson Pollock, owning a piece from this collective is both an honor and a responsibility. Future Implications: How Community Art Can Shape Perceptions The visibility of the Gee’s Bend Quiltmakers is slowly changing as more institutions and museums showcase their works. Events like pop-up exhibitions and collaborations with major brands inject fresh energy into the conversation surrounding American art and craft. However, lasting impact will require more than merely showcasing these works; it will depend on sustained efforts to integrate their narratives into broader discussions about art, culture, and community. Empowering Local Communities Through Art As California homeowners and potential homeowners, we can draw inspiration from the stories woven into these quilts. By supporting local artists and crafting initiatives, we foster community resilience and celebrate our shared heritage. Creating spaces in our homes to showcase local art not only uplifts the artists but also enriches our living environments with meaning. Join the Movement: Celebrate Local Artisans The art and legacy of the Gee's Bend Quiltmakers remind us of the importance of recognizing and valuing underrepresented voices in the art world. As we reflect on their incredible contributions, let us commit to championing local artists in our own communities. Consider visiting exhibitions, purchasing pieces from local artisans, or even trying your hand at DIY quilting projects. Each small action we take can help illuminate these unsung heroes while enriching our own lives. Art is more than decoration; it holds the power to inspire change, stir awareness, and unite communities. By acknowledging the incredible work of the Gee's Bend Quiltmakers, we not only honor their achievements but also contribute to a broader dialogue around art’s role in society.

06.18.2025

Transform Your Kitchen: Fix Crooked Cabinet Doors in 4 Easy Steps

Update Say Goodbye to Crooked Cabinet Doors If you’ve ever cringed at the sight of crooked cabinet doors in your kitchen, you’re not alone. Many California homeowners find themselves dealing with misaligned cabinets, which can be a common issue, especially in older homes. Fortunately, there’s a simple solution that requires minimal effort and tools—just a screwdriver and, if you want to be meticulous, a level. By the end of this guide, you’ll restore order to your kitchen, ensuring that your cabinet doors open and close smoothly. Understanding European Hinges European-style hinges have revolutionized how cabinet doors function. Unlike traditional hinges, which might only provide a little flexibility, Euro hinges offer the unique ability to adjust depth, height, and alignment—all key for a professional-looking finish. Understanding these adjustments makes it significantly easier for homeowners to achieve the perfect cabinet setup. Essential Tools You Will Need Before starting your project, gather the necessary tools: Level: This will help ensure the alignment of your cabinets is visually and functionally pleasing. Phillips Screwdriver: The main tool to make the necessary adjustments to your hinges. Step-by-Step Guide to Fixing Crooked Cabinet Doors This project shouldn’t take more than 10 to 30 minutes, making it a perfect weekend DIY task for busy homeowners. 1. Secure the Hinges Start by ensuring that the hinges are securely fastened to both the cabinet doors and the cabinet's sides. Using your screwdriver, turn the mounting screws clockwise to tighten them. Depending on your hinge model, you may need to first remove the door for better access. 2. Adjust the Depth Next, check if the door is aligned with adjacent doors by adjusting the depth screw. This screw is typically located farthest from the cabinet. By turning this screw, you can shift the door in or out, affecting the gap between the cabinet door and the cabinet frame. Be prepared for a little trial and error—don’t worry if it doesn’t align perfectly on the first try. 3. Fine-Tune Side Alignment If the door remains crooked after adjusting the depth, it’s time to adjust the side alignment. Use the side screw located closest to the cabinet door, allowing you to move the door left or right until it matches perfectly with the adjacent door. 4. Level the Height Finally, if the cabinet doors are too high or too low, adjust the height screw located at the top or bottom of the hinges. Just as with the other adjustments, it may take a few tries to get the height right, but patience is key. Why Small Adjustments Matter Addressing these seemingly minor issues can lead to substantial benefits in your kitchen. Properly aligned cabinets not only enhance the visual appeal of your home but also improve functionality. Doors that close correctly can help maintain the integrity of your kitchen, preventing possible damage from improperly fitted doors. Moreover, well-maintained kitchens can positively affect your home’s market value; potential buyers appreciate a well-cared-for space. Final Thoughts and Call to Action Whether you’re prepping your home for sale or just wanting to improve your living space, adjusting your cabinet doors is a simple task that yields significant improvements. Don’t let misaligned cabinet doors detract from the beauty of your kitchen. Follow these steps to make your cabinets look professionally installed, and remember: achieving that perfect alignment takes practice, so don’t hesitate to make additional adjustments as needed. Now that you know how to fix crooked cabinet doors, why not extend these DIY skills to other areas of your home? Take on new projects to enhance your living space, or perhaps share your newfound knowledge with friends or family members looking to spruce up their homes.

Add Row
Add Element
cropper
update
Cali Home Services
cropper
update

Cali Homes connects buyers, sellers, and renters with a seamless property listing platform. List, search, and connect easily. 

  • update
  • update
  • update
  • update
  • update
  • update
  • update
Add Element

COMPANY

  • Privacy Policy
  • Terms of Use
  • Advertise
  • Contact Us
  • Menu 5
  • Menu 6
Add Element

AVAILABLE FROM 8AM - 5PM

Sacramento, California


Add Element

ABOUT US

Cali Homes connects buyers, sellers, and renters with a seamless property listing platform. List, search, and connect easily.

Add Element

© 2025 CompanyName All Rights Reserved. Address . Contact Us . Terms of Service . Privacy Policy

Terms of Service

Privacy Policy

Core Modal Title

Sorry, no results found

You Might Find These Articles Interesting

T
Please Check Your Email
We Will Be Following Up Shortly
*
*
*